I am a big, big fan of fresh tomato sauce. It is very versatile and has enough of a punch to keep your tastebuds satisfied across varied dishes. This sauce below is great as a pasta sauce, and with small changes, can very well be used for Pizzas and Chicken Parmesan as well. And you can make this ahead of time and you can have yourself a nice meal after a long work day in about fifteen minutes.

IMG_2381

Here’s what you need:

Pasta [I love Spaghetti, but you can use Penne, Fusilli]

6 Tomatoes

1 Onion [Similar size to tomatoes]

6-8 leaves of Fresh Basil [Avoid the dried stuff here]

2 Whole Red Chillis [Dried will be ok as well]

Fresh Oregano [Use the dried bits if you can’t get your hands on the fresh stuff]

8-10 medium cloves of Garlic [Increase to 12 if you really like garlic]

2 Tablespoons Extra Virgin Olive Oil [Use regular oil if you don’t have this]

Salt, Pepper

Parmesan [Optional]

Vodka [Optional]

Start by finely chopping the garlic followed by the onions. Put the oil into a big saucepan/skillet and add the chillis on low heat. Follow up with the garlic and let the garlic cook for two minutes, be sure to not burn it or turn it into fried garlic. Once the raw smell of the garlic goes away, add the onions and a teaspoon of salt and keep stirring till the onions are translucent. Make sure not to caramelize them.

While your onions are cooking, dice the tomatoes and add them to the mix once the onions are done. Turn up the heat and add half the basil, 1 teaspoon of salt and half a teaspoon of pepper. Cook on high for two minutes and turn down the heat, cover the tomatoes and wait for the fat to separate. What you want here is your tomatoes to be mushy enough to be squished by the back of your spoon. Take out the chillis at this point if you do not want your pasta spicy. Once you reach that stage, let the mix cool down with the lid on and use a hand blender to blitz the mix in the pan OR pour the mix into your food processor. You want a smooth mix with all the skin and seeds completely blitzed together.

Boil pasta as per instructions on the box while you wait for the sauce to cool down, but keep one-fourth of a cup of the pasta water for later. Cook at about 90%, the pasta should have a bite at this point. Also a good tip is to add a tablespoon of oil while boiling the pasta, keeps the pasta from sticking in most cases. You could also drizzle some oil on the cooked pasta once you’ve drained it and mix the oil well into the noodles.

Take your sauce and put it back on the heat. This is where you will add the remaining basil [chopped] and a couple of leaves of oregano [1 teaspoon if you are using the dried variety]. Add salt and pepper to taste. You can add some Vodka here and cook till the alcohol burns off. The sauce, at this point, should be thick, almost as thick as Heinz Ketchup. Also a point to note here – This is where you want to take the sauce you are not going to immediately consume and store it for later. I like to cook for 2-3 times at one go. Do refrigerate and consume within a week.

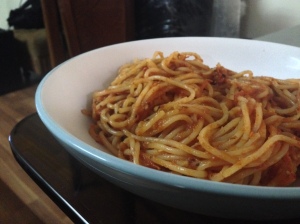
You can now add your pasta and some pasta water to the saucepan and cook the pasta in the sauce for about 5 minutes. Don’t dry your sauce out too much, you want a smooth flowing texture of the sauce. I like to add some chilli flakes for that extra kick and give them a short cook here. You are now ready to serve. Sprinkle some Parmesan on top and you are good to go.

IMG_2169

Finally ate at Johnny Rockets after wanting to do so for about a month now!

Image

Ordered a Smoke House Burger, which was basically a Tenderloin Burger with Bacon, Cheese and Sour Dough Onion Rings (among others) in a regular bun. The burger was very good, all the flavours stood their ground in the burger and I could very easily taste each of the stars of the burger (as mentioned above). What I loved about the Burger was exactly that!

Image

While I’m sure most people have heard mixed reviews about Johnny Rockets, my two opinion on the Burger is that is is definitely worth a shot! While the pictures will show you a fairly thin Tenderloin patty, I personally assure you that the Burger is very much worth every rupee you pay for it. The problem, as far as I see it, with the top three Tenderloin/Beef Burgers I’ve had in Delhi is that the patty just overpowers everything else in the Burger and the Johnny Rockets Burger just refuses to do that. IF Meat is your primary objective with your Burger, I suggest you order a Double, which is basically two patties! 

The Fries served with the Burger were run-of-the-mill McCain-like and the quantity disappointed. The best part about a Hard Rock Cafe Burger (till about a year back) apart from the Burger itself was the Fries they serve. I am of the opinion that a Burger as good as Hard Rock Cafe, Fork You and Johnny Rockets deserves home-style fires and not the frozen (read: boring) variety. The fact that their fountain (Pepsi, Mirinda etc.) are bottomless (multiple refills) is a very big positive the way I see it. I do regret not trying the milkshakes after seeing the stuff they were pulling out and this would definitely be on my agenda next time I visit. 

So should you visit Johnny Rockets over Chili’s, Hard Rock Cafe and Fork You? I’d say yes. The prices may be close but the experience is a completely different one, especially if you’re a Rock n’ Roll Fan. Why the latter? Because the entire staff dances to Johnny B. Goode! They can give the Hard Rock Cafe staff’s YMCA a run for their money everyday, and twice on a Sunday! 

Image

Why I’ve started this review with a picture of Apple Crumble is because it was, honestly, one of the best I have ever had. It was also the highlight of our night, and, yes, it did help end the night on a high!

Mistral is located in Ambience Mall, Vasant Kunj, New Delhi, on the second floor, right next to PVR Director’s Cut. Dictionary.com’s definition of Mistral is ‘a strong cold north-westerly wind that blows through the Rhône valley and southern France towards the Mediterranean, mainly in winter.’ The team at Mistral invited us over for a Chef’s special Meal as a part of the Spring Summer ’14 Menu Launch, which featured starters, main course and dessert. Below is the menu we were offered on the day:

 Image

I started off with the Beetroot Salad of the three from the set. The Beetroot was straight forward and tasted fresh, and even though I am not much of a beetroot person, I do think it hit the right notes with the rocket lettuce. The next was the Salad Nicoise, which was sushi-grade Tuna done up with a crust served with egg and some rocket lettuce, definitely worth a try. The highlight, and I know I have skipped through to this, was the Smoked Salmon & Rocket. The salmon was as fresh as one would imagine it right next to the ocean and the little dribble of sauce on top just completed the bite-sized dish. This little dish really set the mood and the benchmark for what was to follow and can, single handedly, represent what the Mistral team wants Mistral food to represent – Fresh & delicious!Image

Image


Next up for me was the Baked Sole Fillet which was served on a bed on snow peas, broccoli and French beans, flavored with light soy and the Chef Mayank Tiwari’s own little touch, served on a bed of couscous. The plating of the dish was a big positive and did, in fact, go well with the overall theme of the restaurant. The snow peas were cooked to perfect, just like the French beans – Nothing to write home about but it was really well done! The couscous was as expected and went well with the sauce over the vegetables and the crunch of the beans and snow peas. The fish itself, for me, followed the vegetables. The sole was crusted with almonds on the top and baked. The fish broke apart just like I’d expected and did well for itself as a dish. While I personally like a dash of sauce on my grilled or baked fish, this particular dish was one that was meant to be eaten as a whole and not in parts, perhaps something I will stick to next time.

Image

Just a quick one on the restaurant ambience before I get on to dessert. The setup is very classy with a clear-cut upmarket feel to it thanks to its clean layout and partly open kitchen. The bar menu is a mix of international and Indian liquor with a few cocktails that caught my eye. The sangria was bang on, just as one would come to expect from places like such. The overall atmosphere of the place was quite cozy and one that I would recommend for an intimate dinner as much as a dinner date. This place, with a nice view, would not find itself out of place in the best of hotels.

Now for the desserts. I started with the Apple Crumble and was very impressed. The crust was just perfect with the right amount of sweetness and the apples were in the right quantity. Each spoonful of the ice cream, the crust and the bits inside was very well balanced and hit the exact notes I had been promised at the sight of my dessert, served in a fancy bowl on top of a slab of granite. The dessert did, in fact, live up to the expectation its plating set. The balance of the dessert is something I cannot get over primarily because of the sheer number of times I have been disappointed with an overly sweet apple crumble in the past. Mistral did, in fact, pull out the finale with its most potent weapon (in my books). I did take a couple of spoonfuls of the Crème Brulee and loved the texture. It was smooth and the top caramel bit was thinner than paper and browned to perfection. While I’ll go ahead and say that I haven’t had my share of Crème Brulee’s in my time, I will take the risk of saying that the Chef out did the handful that I have had. Both desserts were top notch in my books and can single handedly hold the restaurant up in my books, to the point where I would recommend Mistral’s desserts to all in the vicinity of the restaurant.

Image

Overall, it’s a mystery to me why Mistral hasn’t been able to make enough news till now, perhaps it is Executive Chef Mayank Tiwari who will lead this assault and put Mistral on the map for the Delhi foodie, especially if the focus on the fresh continues along with, as I am sure you can predict by now, the brilliant desserts. I’d recommend you head to Mistral the next time you’re in Vasant Kunj and try out the offerings. Don’t forget the desserts when you do!

I appreciate Zomato, very much. What the good folks have Zomato have done for us food lovers is quite brilliant. Looking for a night out? Yes, Zomato is where you should look. Maybe a day in bed with some warm food? Yes, check Zomato. On your way back from work and craving a nice hot bowl of Khao Soi? Look for the nearest place on the Zomato app. And it all works, almost always.

Top on the functionality list of Zomato is the call-to-connect directly from the application, a breeze really. Next best bit would be the search functionality and the sheer number of filters one can apply. You can basically go down to details like Budgets, WiFi Availability (Although not always correct) and, my personal favourite, Happy Hours! Comes in very handy towards the end of the month! Another good feature is the reviews bit. It’s good to read what other users really think of restaurants and the bit that makes it better is that the reviews go straight to people at the restaurants being reviewed, and they do write back! Two-way communication really works here.

What Zomato offers purely in terms of data and information is great. But is it a one-stop solution for all things foodie? Nope, not at all. While I do refer to Zomato, I do use my judgement while picking places. Their list of top restaurants (Top Trending on the web version, Top 25 on the Android application) is something you should take with a pinch of salt. While it may be based on reviews by users and whatever other metric they use like number of searches etc., I have my own reservations about some of the so called ‘top’ places based on experience. It’s really something worth laughing at for real foodies. For example, Barbeque Nation in Connaught Place is number 2 on their list. Really? Have you ever compared the kebabs there to, say, the Great Kebab Factory? The difference in quality and taste of food at both places is quite epic. While I understand there is subjectivity involved here, it would really help the Zomato cause if there were experts reviewing these places. We’d, then, not have Barbeque Nation & Pirates of the Grill on 2nd and 3rd in the top 25 restaurant list. While these restaurants might be trending purely because of their mass appeals, the reality is that there needs to be a top 25 list made by experts, unbiased and 100% based on the experience at the outlet.

Then there’s the search function. I search for ‘Kailash Colony’ and I get Cafe 27 on top. For what joy, I will never understand. I get the distance logic, but what when a bunch of outlets are located in the SAME locality with the SAME distance? It’s not even alphabetic! Zomato calls it relevance, I don’t know what to call it honestly. Logically, it should be filtered by Distance, followed by either rating or alphabetically. Really silly if you ask me. Almost makes it seem like Cafe 27 is paying them to get itself listed on top.

One bit that would work really well for Zomato is offers. Yes, please let us know about offers going on in specific areas. If Hard Rock Cafe is host to October Fest, I’d like to know when I search for Saket. This would really help get the message out there and will be something people really appreciate primarily because of the relevance of the offer.

Yes, Zomato works. But it’s not reliable as far as I’m concerned. It is to local restaurants and pubs what Google is to searches – Search for what you want and then sift through the information.

Moti Mahal has been my favorite restaurant for, well, as long as I care to remember. Before I start with the review, I think you should know a little about Moti Mahal. I categorize Moti Mahal’s into four categories: Moti Mahal Darya Ganj, Moti Mahal G.K., Moti Mahal Tandoori Trail and the ‘other’ Moti Mahals. The ‘other’ Moti Mahal’s are absolute CRAP. Trust me on this one. Moti Mahal Darya Ganj was the first one. These guys ‘invented’ the Butter Chicken. And this is fact! The Butter Chicken at Moti Mahal Darya Ganj is awesome. The Moti Mahal at G.K. is my favorite, and I’ll get to it after this. The Moti Mahal Tandoori Trail variety is dicey. I have tasted the one in Greater Noida and it is fantastic. Not like the original ones, but they are pretty damn good. The Butter Chicken, again, is the one to hunt for.

Down to Moti Mahal G.K. then. Located in M-Block Market in Greater Kailash – 1, New Delhi, Moti Mahal is the typical unassuming, simple family restaurant. You go there to eat, not to spend time or ‘chill’. This restaurant has been there for ages, and I really hope it stays there, just the way it is, for the years to come.

The starters then. The Tandoori Chicken at Moti Mahal is slightly above average. You may find it a tad dry. The Chicken Tikka, on the other hand, is fantastic. It’s spicy, soft and as close to perfect as you can imagine. They serve the Chicken Tikka on a sizzler plate, which simply adds to the taste and the aura of the entire thing. The Paneer Tikka is also quite nice.

The main course is my favorite part for obvious reasons! The Butter Chicken is a must have when at Moti Mahal. It is out of this world! Unlike what a few idiots might say, the butter chicken at Moti Mahal is, by no means, sweet. The gravy is thick and has a very nice blended flavour of Tomatoes, Butter and Cream. The Chicken is soft, juicy and quite close to perfect for the gravy. The Keema-Egg is also quite nice. It is spicy with oodles of flavor from multiple Indian spices. The Dal Makhani is really thick and has a peculiar taste. The Biryani is also really nice and spicy. The Chicken Biryani is what I like to have there. On the Bread front, the Naans are HUGE. Most people won’t be able to eat more than one if you order starters as well. The Paranthas are soft in the middle and crispy on the corners and complement the Butter Chicken perfectly.

The only dessert I have had at Moti Mahal is the Faluda Kulfi, which is nice but nowhere close to the standards set by the main course. This is not by choice, but because I am too full to eat anything else after the main course. 🙂

You could also end your meal with a pan from Prince Pan bang opposite Moti Mahal. They have a really good Chocolate Pan which is essentially Meetha (Sweet) Pan with a tad bit of Liquid Chocolate in it. Yum!

So what are you waiting for? Go, get to that Butter Chicken!

Okay so this is my first post on this blog, and I intend to fill it up quite a bit.

Anyway, this is one of my favorite low-cal recipes. While finalizing on this recipe, I took in tastes and flavors from a bunch of places, most significant of which was the Spicy Chicken Wings from Slice of Italy, Delhi. This is really simple, and, quite honestly, very difficult to screw up. Here’s what you need:

For 1 Person:

Chicken Wings (Obviously) – 6

Grated/Shreded/Chopped Garlic – Half-Tablespoon (More if you love Garlic, I use an entire tablespoon)

Dried Oregano – Half-Tablespoon

Chilli Flakes – Half-Tablespoon (More if you like it hot)

Salt – To taste (I use half a tablespoon)

Vinegar – 1 1/2 Tablespoon

Olive Oil (Preferably Extra Virgin) – 2 Tablespoons (You could use normal oil, but I am a HUGE fan of Olive Oil)

Black Pepper – 1/2 Tablespoon or to Taste

  1. Mix everything except the chicken together in a large bowl. Make sure everything mixes really well. I mix everything in the olive oil first and then put in the vinegar. Oh, and the smell of the marinade before you put in the vinegar is AWE-SOME. Take a wiff!
  2. Dry out the Chicken wings before you use them. Wash them, put them on a dry cloth and wipe the water off them. Take a big bowl, put in the Chicken Wings and pour over the marinade.
  3. Here’s where it can get a little messy, but you still can’t mess it up. Mix the chicken wings and the marinade really well. I’d say rub each piece with a tad bit of the marinade.
  4. Cover the bowl with foil or cling film or a plate. Just make sure it’s covered and then put it into the fridge.
  5. Pre-Heat the Oven to 220 degrees celcius and let her rip.
  6. Take the chicken wings out of the fridge and line them up on a rack (the oven Grill Tray with the gaps in the middle)
  7. Put the rack with the chicken wings on it into the oven and let the wings cook for 20 minutes. Check on the wings after 15 minutes to see the progress. You’ll know when they’re done when you see a brownish layer on the Chicken Wings. Pull out a small piece of the meat and taste it to see if it’s done.
  8. Pull ’em out of the oven and you’re done! Enjoy!

You could grill the Chicken Wings if you are lucky enough to posess one. But remember to make some extra Marinade without the vinegar and rub it on the wings while you grill them.

You could also pan-fry them using a non-stick pan but they tend to dry up a tad bit once done.

Mutton Rogan Josh is one of my family specialties. My mom has been making a similar version for as long as I remember, and I have had a variant at almost every non-vegetarian relative’s place. It’s quite simple to make and is enjoyed both with Rice and Indian Breads. This version goes best with Parantha’s from the tandoor. My version also requires a lot of patience. I usually cook it in the slow cooker, but you can cook it just as well on the stove.

Here’s what you need:

Lamb – 1/2 Kg (Assorted pieces, but mostly chops)

Grated Onions – 8 Medium Sized

Grated Tomatoes – 5 Medium Sized (or use a similar quantity of Tomato Puree)

Minced Garlic – 2 Tablespoons

Minced Ginger – 1 Tablespoon

Vegetable Oil – 4 Tablespoons (Use clarified butter if you don’t mind the extra fat)

Cloves – 4

Green Cardamom – 2

Black Cardamom – 2

Cinnamon – 2 inch stick

Crushed Black Pepper – 2 Tablespoons

Red Chilli Powder – 1 Tablespoon (Adjust for taste)

Dried Red Chilli – 2 full

Water – 1 1/4 Cup (2 Full cups if you want to have the mutton with rice)

Coriander – Little bit for Garnish

Salt – To taste

  1. In a big wok, heat the oil and put in the Dried Red Chilli, Green Cardamom, Black Cardamom, Cinnamon Stick, Cloves and the Crushed Black Pepper. Wait about 2 minutes and put in the Ginger and Garlic. Cook on Medium till the Ginger and Garlic just about turn brown.
  2. Put in the Grated Onions and Tomatoes, stir in the salt and chilli powder and cook till brown. Be careful to not burn them.
  3. Once brown, put in the Lamb and coat all the pieces really well. You wanna put in only 1/4 cup of water at this point and cover the wok. Put the heat to low once the water comes to a boil and leave to cook for about 20 minutes. The Lamb will release its juices and that is exactly what makes this dish so great.
  4. Stir in rest of the water and bring to a boil on high-heat. Put the heat to low again and cover the wok. You’ll need to cook this for at least an hour more on low. You could also put it in a pressure cooker and cook it, but that is really not how I would do it.
  5. Check whether the Lamb is cooked. You will have to bite into it to ascertain whether it is done or not. Check the gravy for flavor and adjust salt and pepper levels as per your taste.
  6. Put the whole thing in a big bowl and garnish with chopped coriander.

This is one very simple dish (Once you’ve got the tomato sauce!) and pleases most palettes. There are certain variations that I will post within this recipe to adjust for multiple taste types. This goes really well with Garlic Bread by the way and makes for a fantastic and fulfilling lunch.

Here’s what you need:

Tomato Sauce for 2 (Recipe)

Penne/Fusilli/Spaghetti/Macaroni – Enough for 2 people (My way of measuring is 2 fist-fulls of the smaller variety for each)

Olive Oil – 2 Tablespoons

Minced Garlic – 2 Tablespoons

Finely Chopped Basil Leaves (Fresh) – 1/2 Tablespoon [Optional]

Oregano – 1 Tablespoon

Sugar – 1/2 Tablespoon

Salt – To taste

Pepper – 1/2 Tablespoon [Adjust for taste]

Finely Chopped Red Chilli – 1 Tablespoon [Optional if you want it to be spicy]

Grated Parmesan Cheese – 1 Tablespoon [Optional]

  1. Start by filling a large vessel with filtered water. Put this on the heat on high and cook your pasta as per the manufacturers instructions. Normally, you put in the dry pasta once the water starts to boil for anywhere between 8-15 minutes.
  2. While your Pasta boils, heat the Olive Oil in a wok and stir in the garlic. Cook the garlic well so you get the flavor infused into the oil really well. Cook on medium for about 2-3 minutes, or till the garlic is just about brown.
  3. If you like you want your sauce to be nice and spicy, you need to stir in the Chopped Red Chillis with the same quantity of Tomato sauce and cook them a little bit first. If you can’t find fresh red chillis, you can use the dried variety by soaking them in warm water for about 5 minutes and them putting them in a blender. Once you have the red chilli paste, you combine it with the same quantity of tomato sauce in a small bowl first and then pour it into the wok.
  4. Add the entire tomato sauce now and cook on high heat till the sauce comes to a boil. You need to stir continuously here. Put in the sugar to get rid of the sourness of the tomatoes. Be super-careful here – you do not want to make your sauce too sweet. Use the sugar with care is all I’ll say.
  5. Put in the Oregano, Basil Leaves, Salt & Pepper into the sauce and cook uncovered on a low flame for about 10-odd minutes. You’ll need to play it by ear and stir & check the sauce ever few minutes. When the sauce is cooked, it turns into a dark red and you no longer taste the rawness of the tomatoes.
  6. Drain your pasta once it is boiled and stir into the cooked sauce right before you serve. Put some Parmesan cheese on top and serve. Enjoy!

The famed Tomato Sauce is the base for a bunch of my favorite recipes, most prominent of which are Pasta in Tomato Sauce and Pizza. You need to make this to take the a bunch of recipes I will post in the next few days, and yes, one of them is the awesome Pasta in Tomato Sauce (Arrabiata if you wanna call it that). I think amateurs will find this one really helpful primarily because the majority of recipes on the internet typically use canned tomatoes, and I am not a fan of using anything canned. Plus they aren’t as easily available around where I live.

You’ll need about 10 Medium Sized Tomatoes to make enough sauce to eventually make enough Pasta sauce for two. Oh! And be very picky with the tomatoes here. You want firm ones without any blemishes on the skin.

Chop each tomato into half and line them up seed-side down in a big saucepan. Sprinkle some salt on top of the tomatoes, put the pan on medium heat and cover it. You’ll need to constantly monitor the tomatoes and make sure they don’t burn. Once they’re squidgy or super-soft to touch with a spatula, they’re done. This is about a 15-20 minute process.

Take the tomatoes, about 4 pieces at a time, with a spoon and put them on a strainer, which ideally sits above a big bowl (You don’t want to waste the juice now do you?). You’ll need to mash the juice out of the tomatoes now. I recommend you use a whisk and mash each tomato and extract the juice out of it. Repeat the whole thing till all that’s left in the strainer are seeds, bits of the tomato skin and excess pulp.

Your basic tomato sauce is done. If you would like to preserve it and use it later too, add about a tablespoon of vinegar and about a table spoon of salt into the sauce and mix really well. Simple!

One of my favorite Lunch items, Burgers! Now this isn’t your run of the mill burger you can pick up from a McDonald’s. This is the real deal and it is GOOOOOOOOD! You’ll find Burgers like this in American Restaurants like TGIF (Which is where I got the idea to make this). Now let me clarify that the Americans are big fans of Beef and Pork Burgers and Lamb is just something I use because we don’t get Beef here easily and I don’t really trust freshness of the Pork that’s available.

Here’s what you need for 2 Lamb (or Chicken) Burgers:

Burger Buns – 2

Minced Lamb (or Chicken) – 200 Grams (You’ll need REALLY good quality meat here. I suggest you get it from a nice place or get it Minced right in front of your eyes.)

Bread Crumbs – 1/2 Cup (If you don’t have bread crumbs, simply bread about 3 pieces of regular bread and put them in a blender and run it for about 30 seconds)

Egg – 1

Onion – 1 Medium chopped finely

Garlic – 4-5 Cloves chopped finely

Salt – 2 Teaspoons or to Taste

Red Chilli Powder – 1 Teaspoon or to Taste

Cheese Slices – 2

Lettuce – About 4 Leaves (Do NOT overdo the lettuce)

Mayonnaise – As much as you like

Mustard – As much as you like

Sliced Tomato – 2 Big slices or 4 smaller ones

Sliced Onions – 2 Big slices or 4 smaller ones

Olive Oil – 3 Tablespoon

  1. In a nice big bowl, break the egg and whip it well. Add the Minced Meat, the Bread Crumbs, Chopped Onion, Salt and Red Chilli Powder and mix really well with a fork. You’ll have to get a little messy here and make a Burger Patty with your hands. Simply take a fistful of the Meat mixture and turn it round and then flat. Make about two Burger Patties from the mix and put them on a plate to rest.
  2. Heat up your Grill or Pan and put in the olive Oil. Using a flat Spatula, scoop the Burger Patties and put them in one after the other. Make sure you don’t crowd the Grill or Pan. Keep the heat high and flip the patty after about 90 seconds(1 Minute if you’re making it with Chicken). Wait for a minute and turn the heat to medium.
  3. About 5 minutes later, flip the patty again and break a little bit from the side and taste if it is done. It doesn’t take more than 7-9 minutes(5 Minutes for the Chicken) normally but you wanna be sure that it is done. Once it tastes cooked, you turn the heat high and flip after a minute. At this point, you should put the cheese on top of the patty and cover your pan or grill. The cheese should melt in about 30 odd seconds. Remove the cover and take the patty off the grill or pan and leave it to rest for just a minute.
  4. Slice the Burger Buns in half and put both sides facing downwards (the Flat part) on the Pan or Grill. You could use some butter if you want. Let them be for about a minute on high heat or longer if you like them crisp from the inside.
  5. Put the Mayonnaise and Mustard on the bottom part of the bun and put the burger patty on top. Put the Sliced Onion and Tomato on top of the patty, and the Lettuce on top of that and shut the Burger with the top half. Serve Immediately!

In the pictures I’ve overdone the lettuce, but removed them once I started to eat simply because the burger was too big! Now people may argue that an Authentic ‘hamburger’ should not have any condiment except ketchup, but I like using ketchup on the side and Mayo and Mustard on the Burger. The perfect side dish is French Fries. I use pre-packaged French Fries because they’re much better than what I can do at home, and a lesser pain in the ass!